
I’ve been sharing a pattern every Wednesday over on my Instagram and I’ve bene having so much fun creating them, that I thought I’d share two ways of creating a repeating pattern with you guys to share the love. Creating a professional looking, repeating pattern is surprisingly easy when you use these two techniques.
But for this I really wanted to push myself to create something a bit more complex than usual, so I took some inspiration from one of my favourite artists and designers of all time, William Morris. I love the way that all of his patterns flow together and seem to interweave so intricately. There’s something a little bit magical about seeing his process sketches – I would highly recommend you take a trip out to the William Morris Gallery or at least the top floor of the V&A if you’re ever in London to see them. They’re so magical in fact that I thought creating something similar was completely out of my reach. But, with a little bit of work, I feel like I’ve been able to create something which, even if I’m still learning, takes a lot of inspiration from the patterns I love.
All you will need to do these really is a pencil, a ruler, some paper, and some kind of image editing software e.g. Affinity Designer. But, if you’re not confident designing on the computer you might also want to have some scissors, and colouring pencils or paint nearby.
METHOD 1
This method is the one that I’ve used the longest, and the most frequently. It’s really simple and doesn’t really require any forward planning. It works best for patterns with separate illustrated elements, but you can also use it for more interwoven patterns.
1. I usually work completely digitally for this method, so the process images are screenshots, but I have added in notes if you want to work physically.For this method you’re going to want to start with a square, whether you’re working on a piece of paper or on the computer. I’m pretty sure you could do this with a rectangle too, but I always like working with a square
2. Then just draw whatever you want to be in your pattern. I went with some naked ladies because I was feeling sassy. The only rule here is don’t touch the edges of your square – I put some guidelines in to remind me, but you don’t need to.
3. Once you’ve filled in the middle of your square, you want to divide it up into quarters. So, if you’re working on paper you’re going to need to carefully cut your drawing.
4. Now you’ve got 4 little squares, you need to rearrange them so that the top left square becomes the bottom right, the top right becomes the bottom left, the bottom left becomes the top right, and the bottom right becomes the top left. Then you need to stick it together to make one big square again. If you’re working on paper, but the sticky tape on the back of the paper because you’re going to need to do some more drawing.
5. Because of how you’ve rearranged the squares, you should now have a bit of space in the middle and across the joins of your square. You’re going to want to fill in those spaces with some more of your illustrations, so that the full square is evenly covered.
6. Now you have a finished pattern tile! You can now repeat your pattern, by copying the square and putting them together, over and over again. If you’ve been working on paper, you’re probably going to want to scan your tile in, and then edit it digitally so you can reproduce it more easily.
And there you have it, a repeating pattern that you can print onto pretty much anything!
METHOD 2
This is my William Morris inspired method. It requires a bit more planning, and, for me redrafting. Fun fact, William Morris didn’t like to redraft his patterns, he thought any design worth its salt could be made and coloured in one single draft. We disagree on this. Because this method requires mirroring of tiles, it doesn’t work as well for illustrated elements like characters who mightn’t look as good flipped. Instead it’s best for more interwoven patterns featuring more abstract or simple natural elements, here I have used leaves and more natural elements taking further inspiration from Morris.
1. Method 2 works best if you start with a rectangle. Personally, I like to draft on paper, and overlay a grid onto my initial sketch because it helps me visualise where parts will join up an keeps my design neat.
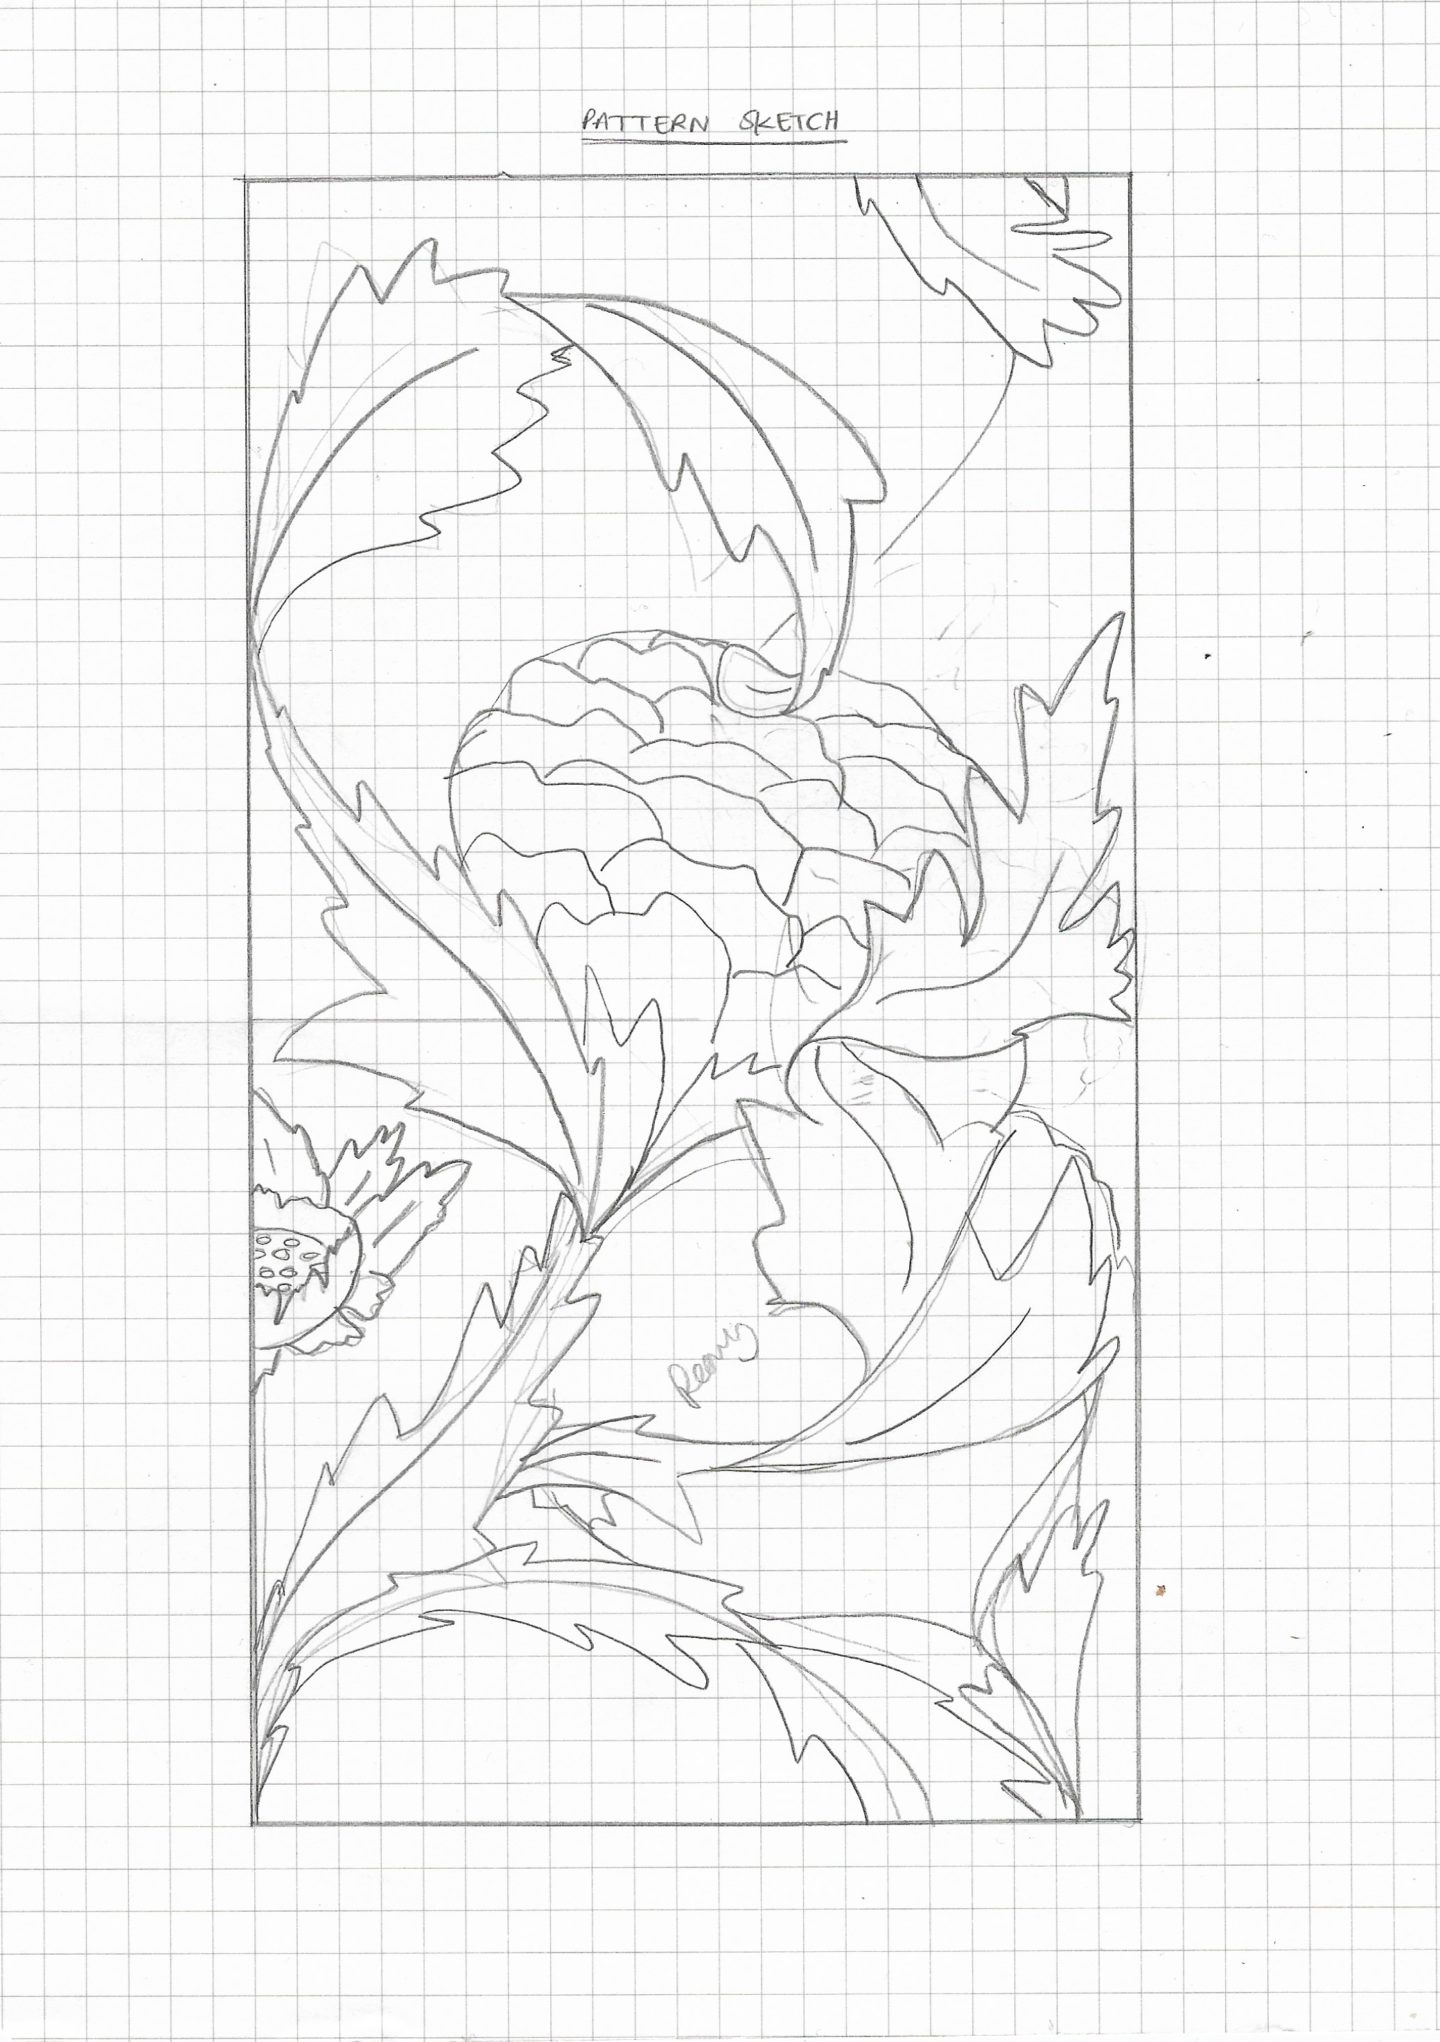
2. Then you want to sketch out your design. I begin with just drawing out the structure of my design using curves and lines to show where I want elements to go and how I want the pattern to flow across the tile. You really want to create a sense of movement across the tile. Unlike the first method, you want to go right to the edges, and into all of the corners.

3. Once you have your layout you’re going to want to refine (and colour) your design. I normally do this using Affinity Designer, but you could certainly do this on your physical page still. As my sketches are quite messy, if I was working on paper I would transfer my design onto a fresh sheet using some tracing paper.
4. Now you have your first pattern tile, you want to duplicate and flip your image 180 degrees, then place them together. This is best done digitally, so if you’ve been working on paper up until now you’re going to want to have scanned and cleaned up your design.

5. Then take your two tiles together and flip them vertically, if you have an element that only works one way up e.g. a bird you can skip this stage, to create a master tile made up of 4 of your original design.
6. Once you have that master tile you can check to see if there’s anything you want to change or refine. It’s also worth trying your design rotated at this stage too, so you can see which way round it looks the best.
When you’re happy, get repeating!

This is super useful, I always thought of pattern making as such a complicated and laborious process, and though it still takes a while I’m sure this definitely takes some of the mystique away (and I will be giving it a go)!
The Quirky Queer
I was in exactly the same boat not too long ago – I thought you had to do loads of measuring and you had to know exactly how the bigger picture would come together. But as soon as I actually started making patterns I found how easy and fun it really is!